页面类型
发布状态
发布日期
文章地址
内容摘要
文章标签
文章分类
icon代码
密码
最近没钱续宽带,用了用房东的宽带,谁曾想房东宽带的速度稳定性还很给力,就是没了公网,NAS用户体验直接夭折,官方的中转服务越用越气,应应急还行,所以研究了一下,利用 NewFuture/DDNS 开源软件配合 fatedier/FRP 实现了多地转发、异地容灾的折中方案,出奇稳定,还使用了 Cloudflare Tunnel 实现保底连接,从此 NAS 永不失联。
文章内容尽量讲透整体的实现思路及原理,后期有空再提供完整服务器端及客户端的 docker compose 模板降低学习成本
注意事项
实现的本质是利用中间服务器进行中转,但我们可以利用 Cloudflare Tunnel 实现转发,起码比 NAS 官方中转好使。
1、中转服务器一个或多个(可选);
2、家里或朋友有公网的宽带能给你用(可选);
3、域名一枚并由Cloudflare管理;
4、NAS安装配置 Cloudflare Tunnel;
5、因人而异。
基本思路
用python编写程序使用tcping间歇测试中转服务器与NAS的通讯情况,选择最优的服务器解析到”nas.xxx.com”域名,若配置的服务器均无法访问,解析至 Cloudflare Tunnel 确保基本的连接保障,只要NAS有网既可以访问,NAS 到内部的应用使用了 nginx 进行反代理,为了配置证书及统一接口。
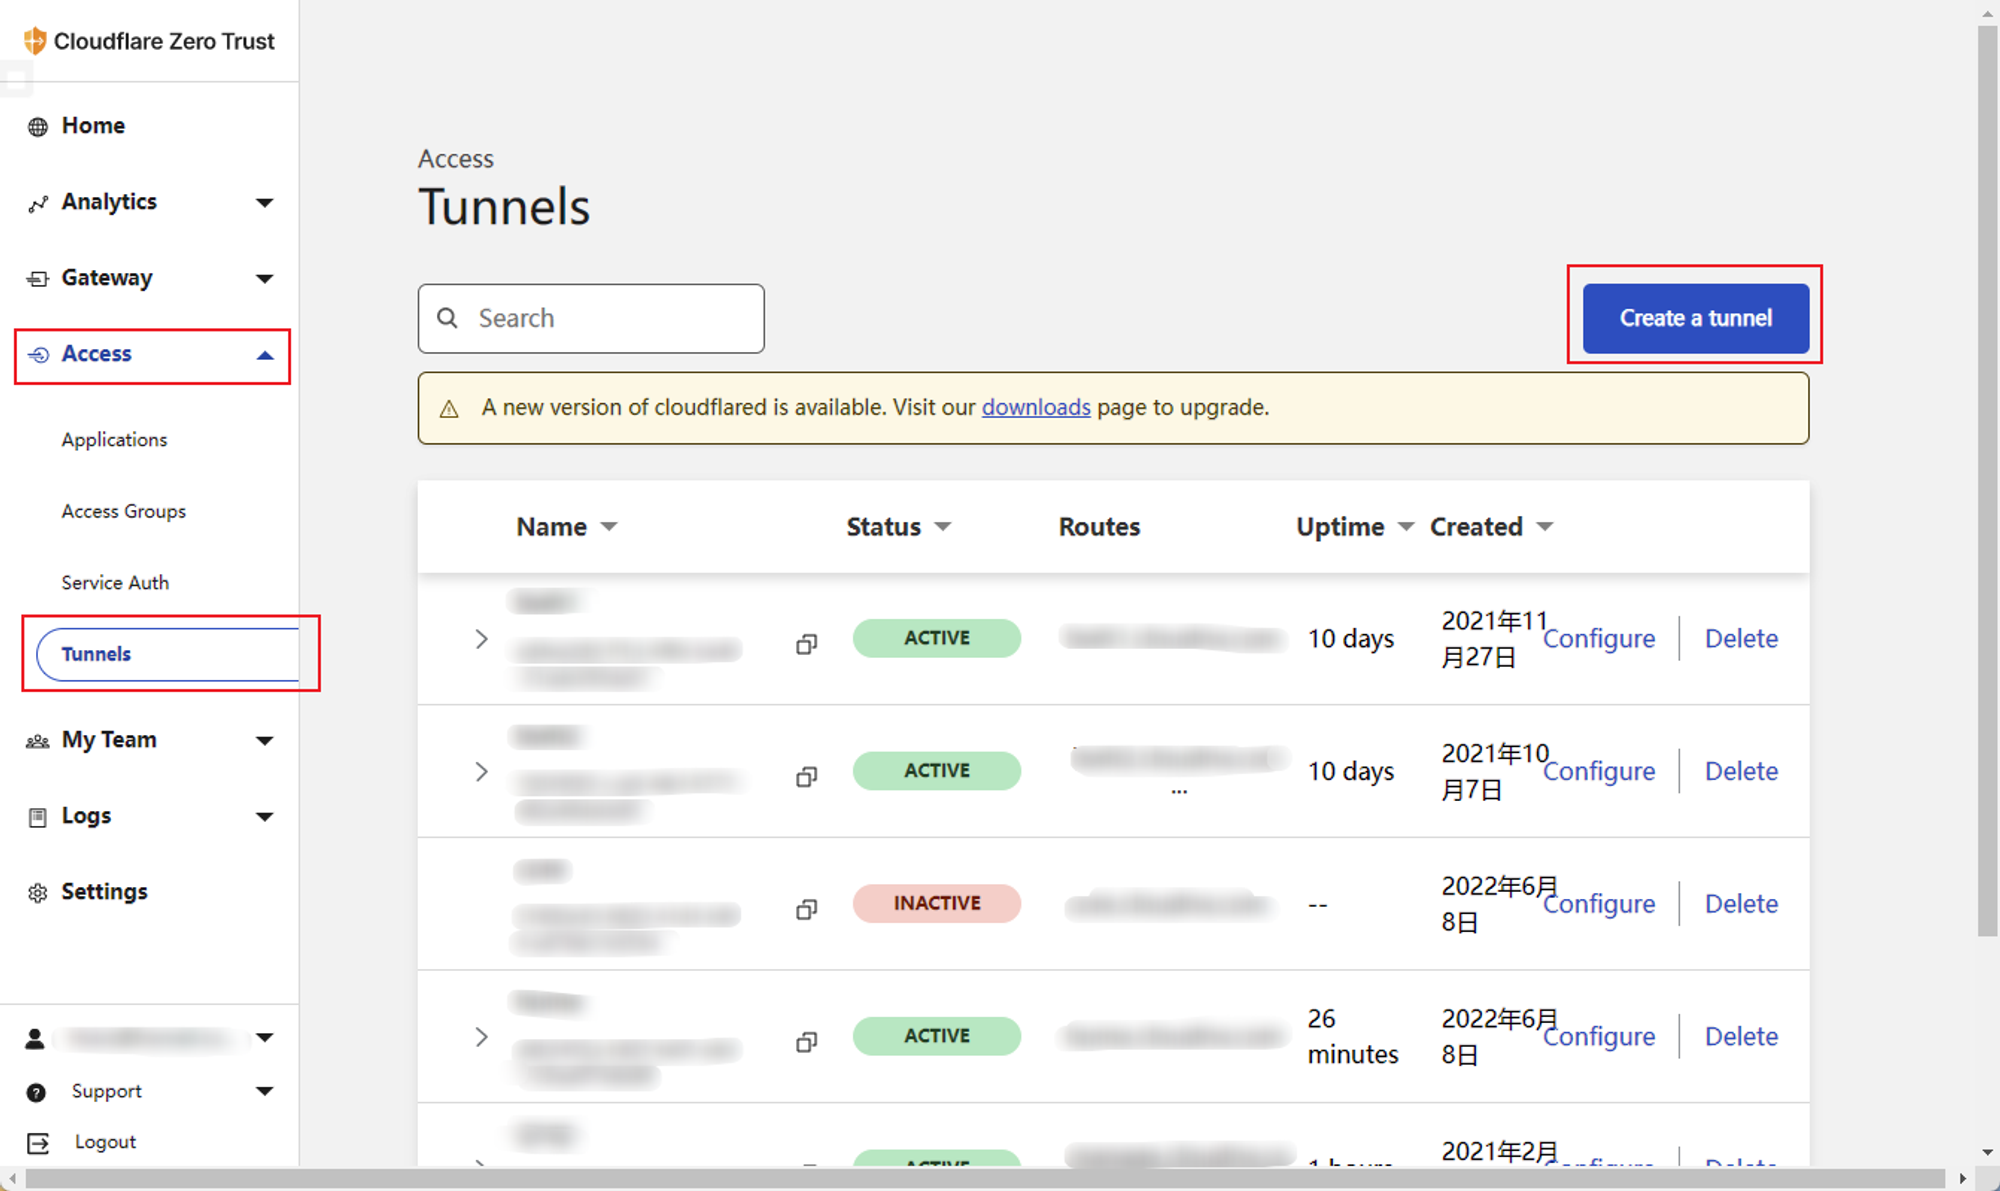
创建 Cloudflare Tunnel
登录 Cloudflare 的 Zero Trust 控制面板,在左侧导航栏的 access 选择 tunnels,创建一个隧道名称随意,创建后会提供官方安装方案,将隧道程序安装到NAS主机。
配置好后端地址,此时 Cloudflare 会创建一条解析记录,cname 到 Connector ID。
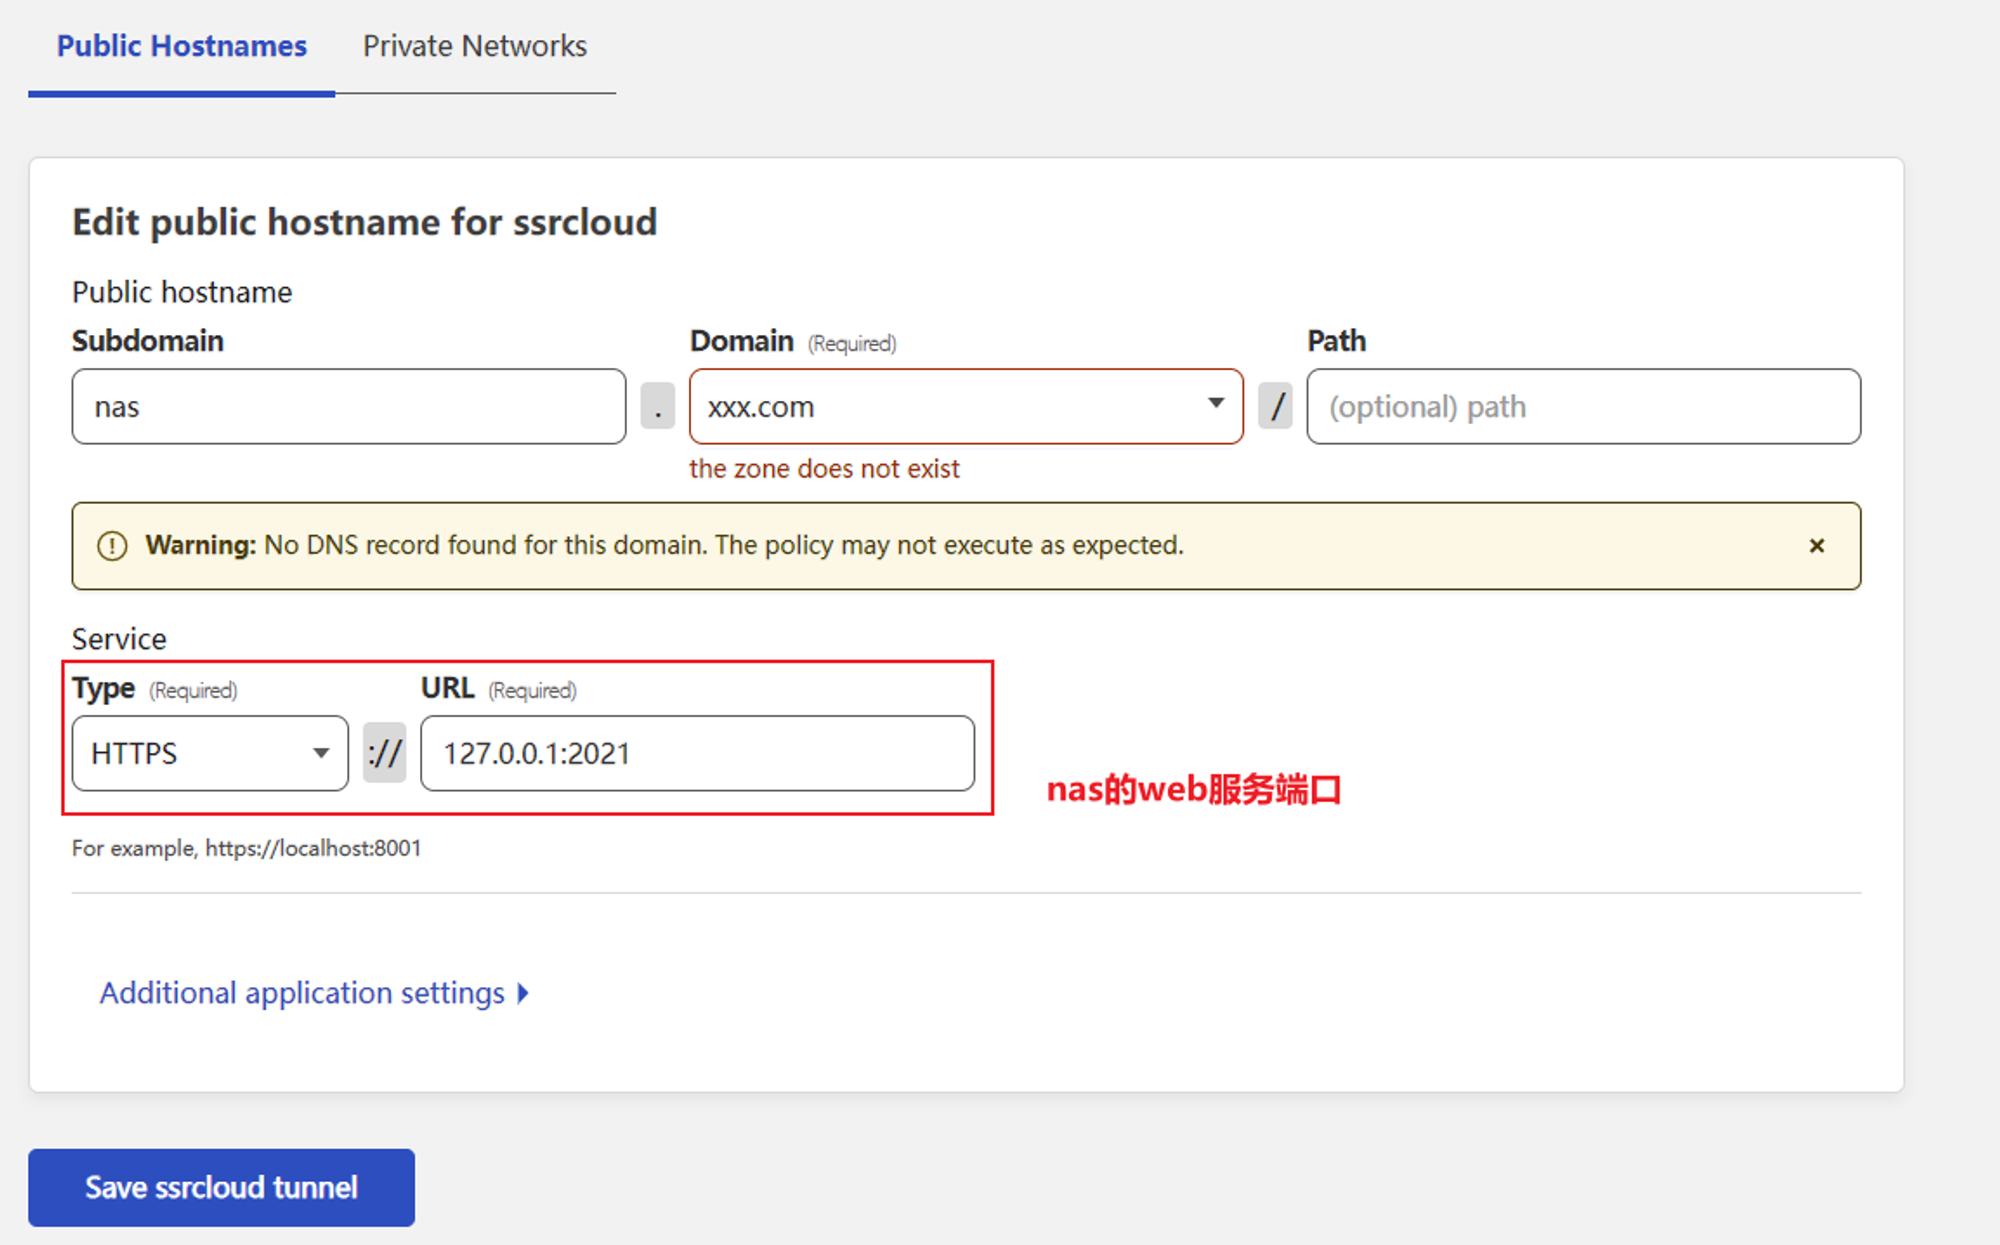
安装完成后保留好 Connector ID 以备后用

配置中转服务器
在中转服务器安装 FRP 服务端,安装方法参考官方文档。
配置文件参考:
高级玩法:实际使用中发现,如果是安装在家宽并单独使用 FRP 进行 NAT 一段时间后运营商会有一定几率封端口,建议使用伪装工具对 FRP 流量进行隐藏保安全。
NAS 安装 Nginx
在 NAS 上使用 Nginx 对内部服务进行反代理,这样的目的是为了统一接口和配置域名证书,具体配置方案网上找找吧,这个都是因人而异,网上也很多关于nginx反代理的教程,这里提供我其中反代 NAS 页面的参考。
Tips:Nginx 可不止能反代理 WEB 哦。
需要注意:FRP 客户端若开启了 Proxy Protocol ,nginx 也要开启 Proxy Protocol 协议。
NAS 安装 FRP
NAS 上需要安装 FRP 客户端,配置了多少个服务器就需要安装多少个客户端(推荐使用Docker)。
配置文件参考:
NAS 安装 DDNS
程序由 NewFuture/DDNS 的源码二次开发,主要实现的作用是测试中转服务器的可用性,选择延迟最低的更新解析到指定域名,从域名解析层实现故障切换,如果配置的中转服务器均无法使用解析到 Cloudflare Tunnel ,由于 Cloudflare 有端口限制除了固定的端口外,其他端口是无法访问的。这就是为什么要用 Nginx 进行反代理统一接口的原因之一。
配置说明:
具体安装及使用方法可参考官方教程:https://github.com/NewFuture/DDNS/blob/master/README.md
二次开发(本文使用)
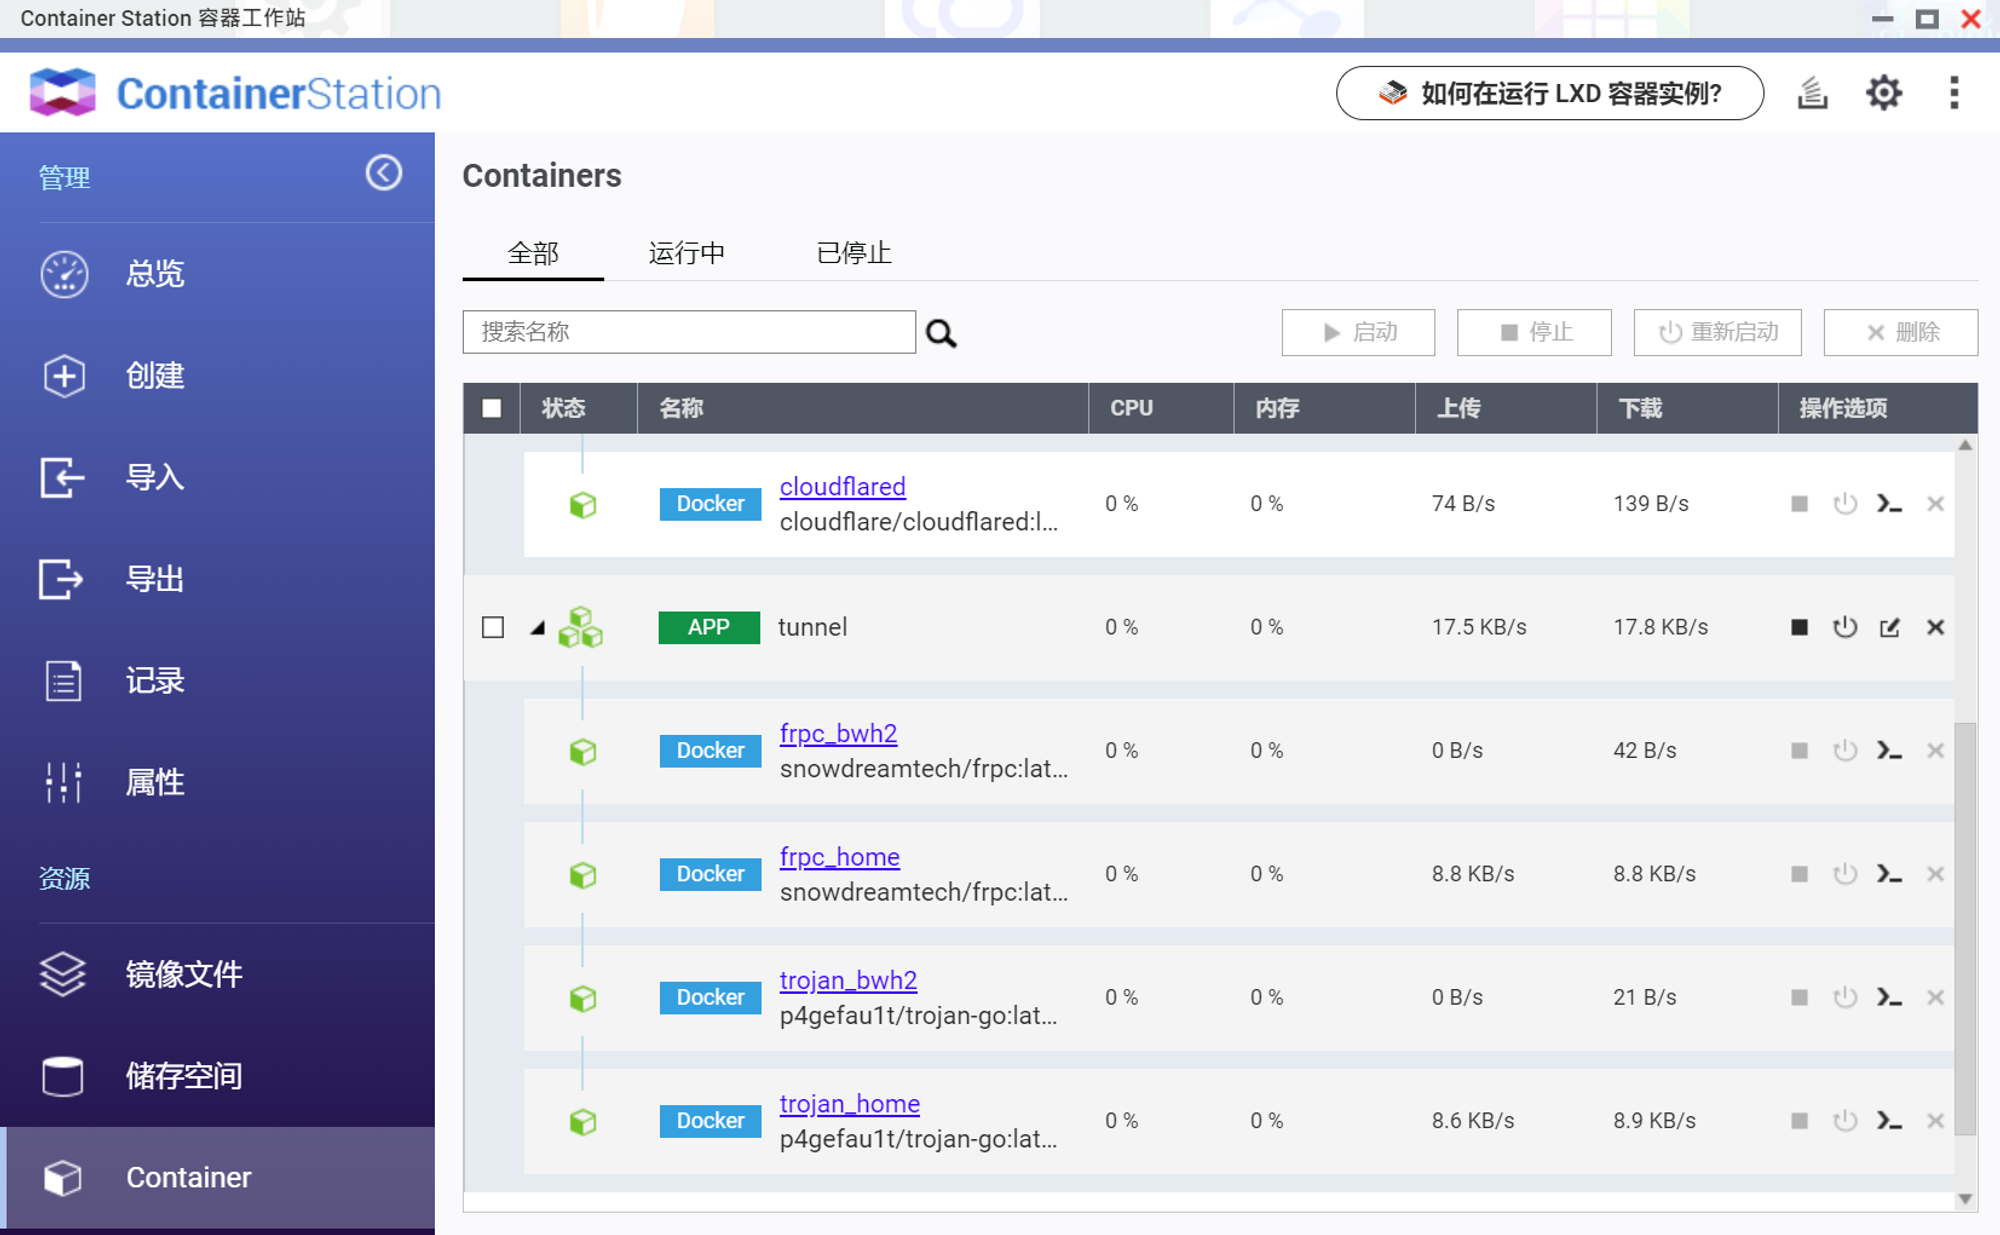
实际效果
DDNS 服务解析更新地址的记录

实际维护了两条中转隧道,家用公网做主用、服务器备用,CloudFlared 保底备用。
更新计划
兼容本地公网(下篇文章更新)
未尽事宜欢迎留言沟通